root@ubuntu-server:~# cat /etc/apache2/sites-available/zabbix
<VirtualHost *:80>
Alias /zabbix /usr/share/zabbix
ErrorLog /var/log/apache2/zabbix-error.log
CustomLog /var/log/apache2/zabbix-access.log common
</VirtualHost>


root@ubuntu-server:~# a2dissite default

root@ubuntu-server:~# a2ensite zabbix
Besides it is also necessary to modify the PHP configuration file for adjusting it with the Zabbix requirements.
root@ubuntu-server:~# cat /etc/php5/apache2/php.ini
...
memory_limit = 256M
post_max_size = 32M
upload_max_filesize = 16M
max_execution_time = 600
max_input_time = 600
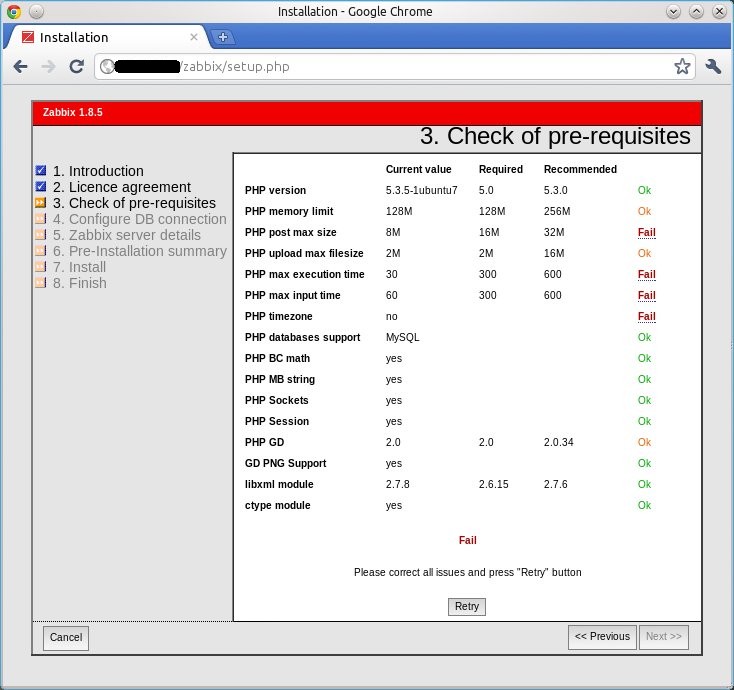
date.timezone = Europe/MadridFinally, we have to open a web browser, point to the Zabbix URL (http://ubuntu-server/zabbix in my case) and fulfill the wizard. In the first screen, Zabbix checks the pre-requisites and warns us if something is wrong.
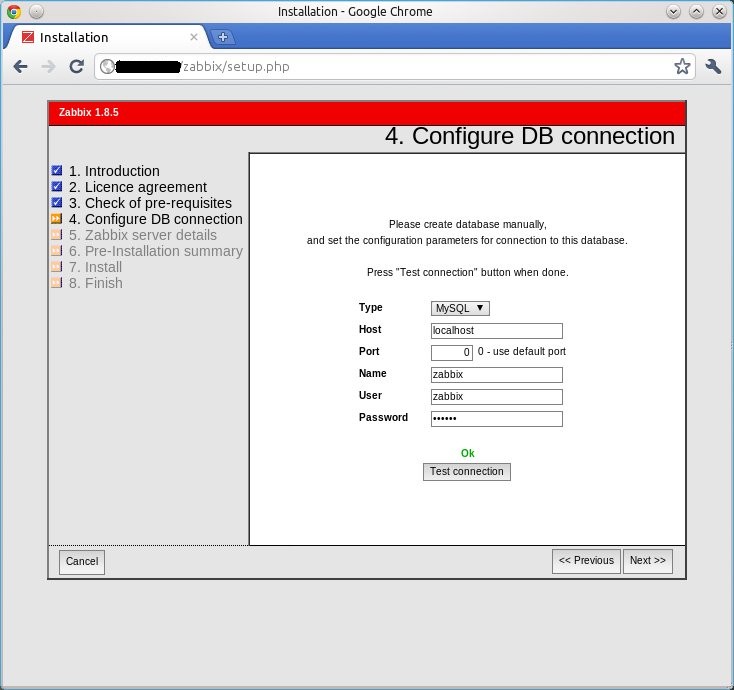
In the fourth step (Configure DB connection), we have to enter the configuration parameters for the database connection.
At the end of the wizard, we must download the Zabbix PHP configuration file (zabbix.conf.php) by clicking on the Save configuration file button.
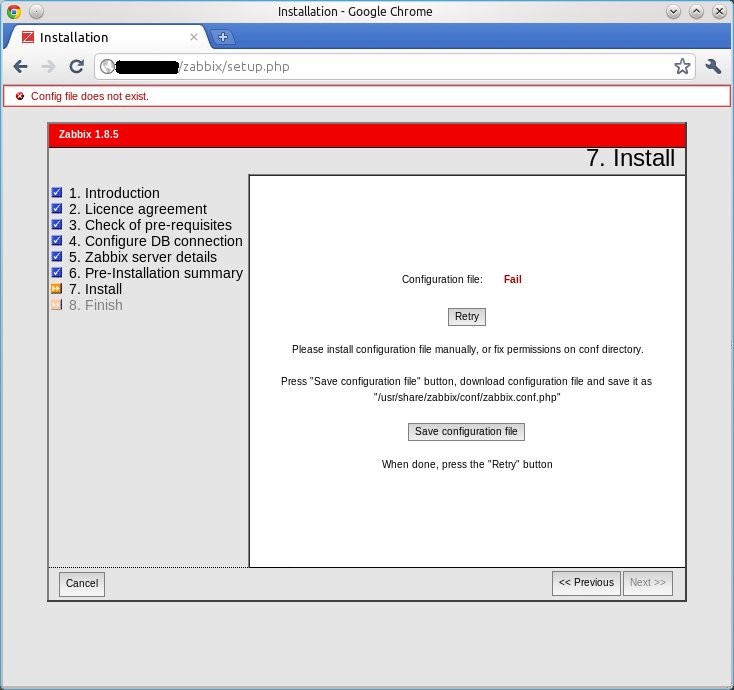
Then we have to copy that file into the /usr/share/zabbix/conf directory and fix it the suitable permissions.
root@ubuntu-server:~# chmod 600 /usr/share/zabbix/conf/zabbix.conf.php

root@ubuntu-server:~# chown www-data:www-data /usr/share/zabbix/conf/zabbix.conf.php
Excellent Articles both of them.
ReplyDeleteJust add login information after installation. In my case following details work.
Login Name:- Admin
Password:- zabbix
Thanks
Amit Bondwal