Today we are going to learn how you can rapidly create a virtual machine from an OpenVZ template (I cannot utilize KVM because I have installed Proxmox VE 1.7 on a KVM/libvirt virtual machine and therefore, that virtual CPU does not have Intel VT / AMD-V support. Don't worry because the KVM process is similar to OpenVZ).
First, we have to open the VM Manager, Appliance Templates section and select the Download tab. Here you can see a list of templates ordered by means of different categories: certified appliances, admin, system and web. Also we can get more OpenVZ templates from lots of web sites and manually upload them to the Proxmox VE data area.
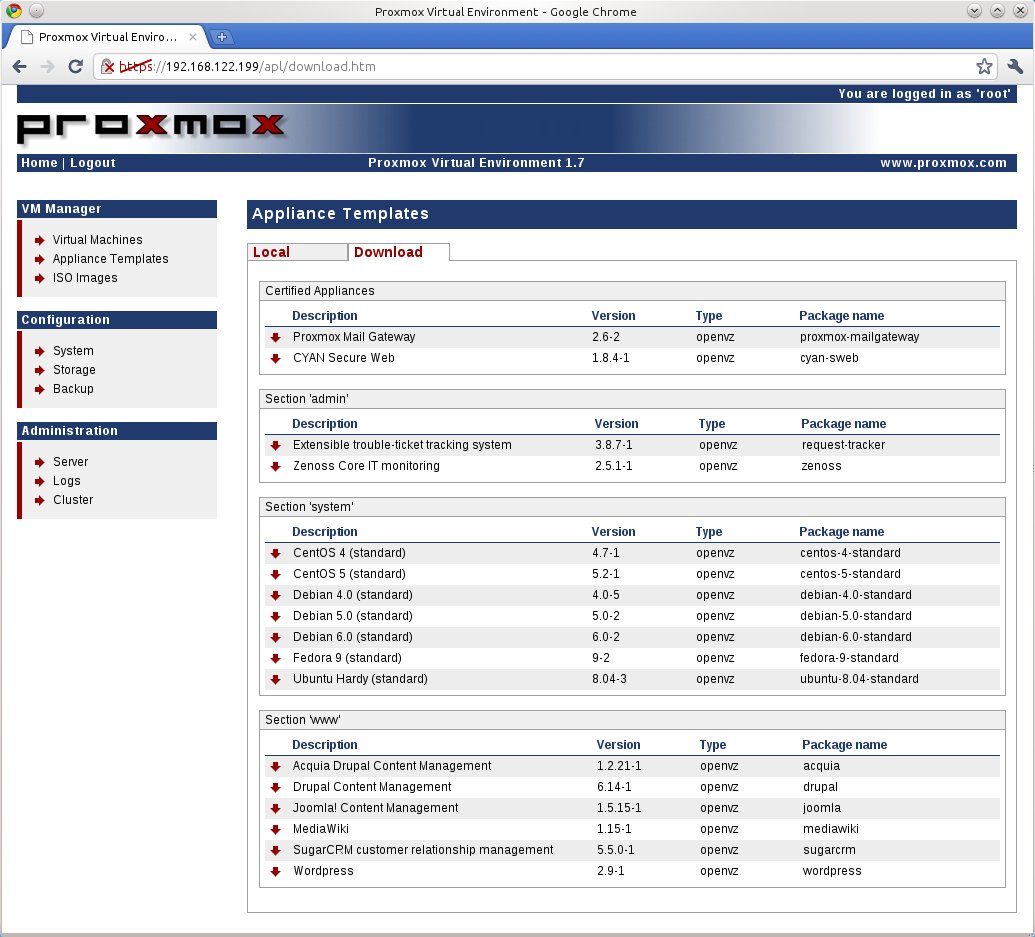
In my test, I am going to choose a CentOS 5 (standard) distribution and download it since Proxmox VE.
Afterwards we have to move to the VM Manager, Virtual Machines, Create section and fill the several fields that you can look in the following figure.

Most of the options are also typical in other virtualization products: hostname, memory, disk space, etc., but I am going to stress two: on the one hand we have the type of virtual machine; I picked out Container (OpenVZ) because it is the only allowed option due to the virtual CPU issue that I commented before. And on the other we must select the sort of network for our virtual machine.
With Proxmox VE you have got two option for the network devices: Virtual Network (venet) or Bridged Ethernet (veth). Basically, venet (virtual network device) provides a point-to-point connection between the guest and the host with better performance and more security, but on the contrary, there is no MAC address and full support of IPv6 stack regarding veth (Virtual eTHernet). In the next article, you can read more information about this topic: Differences between venet and veth.
And finally, we must press the create button and in a few seconds, we will have our virtual machine totally created and perfectly working.
In order to launch it, we must go to the VM Manager, Virtual Machines, List section, make click on the virtual machine that we want to turn on, and press the Start button. In this area we will be able to change different components of the virtual machine.

The Open VNC console option is used to pop up a new window with graphical access to the virtual machine.

Hello,
ReplyDeleteFrom my experience,the KVM for managing Windows using Proxmox results in excellent performance compared to ESXi and Xen. I've even informally benchmarked them. What is your experience using Red Hat's KVM vs Proxmox - performance wise?
Hi,
ReplyDeleteI am not sure if KVM under Proxmox has got better performance than ESXi... my experience with KVM virtualizing Windows systems is not really good (regarding performance).
What about RHEL's KVM? RHEL5 started using Xen as default virtualization tool, and afterwards, it moved on to KVM. RHEL5 is a Linux system with packages very obsolete, such as KVM or the own kernel (on the contrary, you have got a system much more stable).
In contrast, you can check that when Proxmox releases a version, it always has got the lastest components related to virtualization installed on it.
And finally, I think now would be great to compare RHEL 6 vs Proxmox.
Proxmox is good solution
ReplyDeleteAdmiring the time and effort you put into your blog and detailed information you offer!.. buy rdp
ReplyDelete